Category: Guides

  • How to Convert JPG to WebP for Free

    How to Convert JPG to WebP for Free

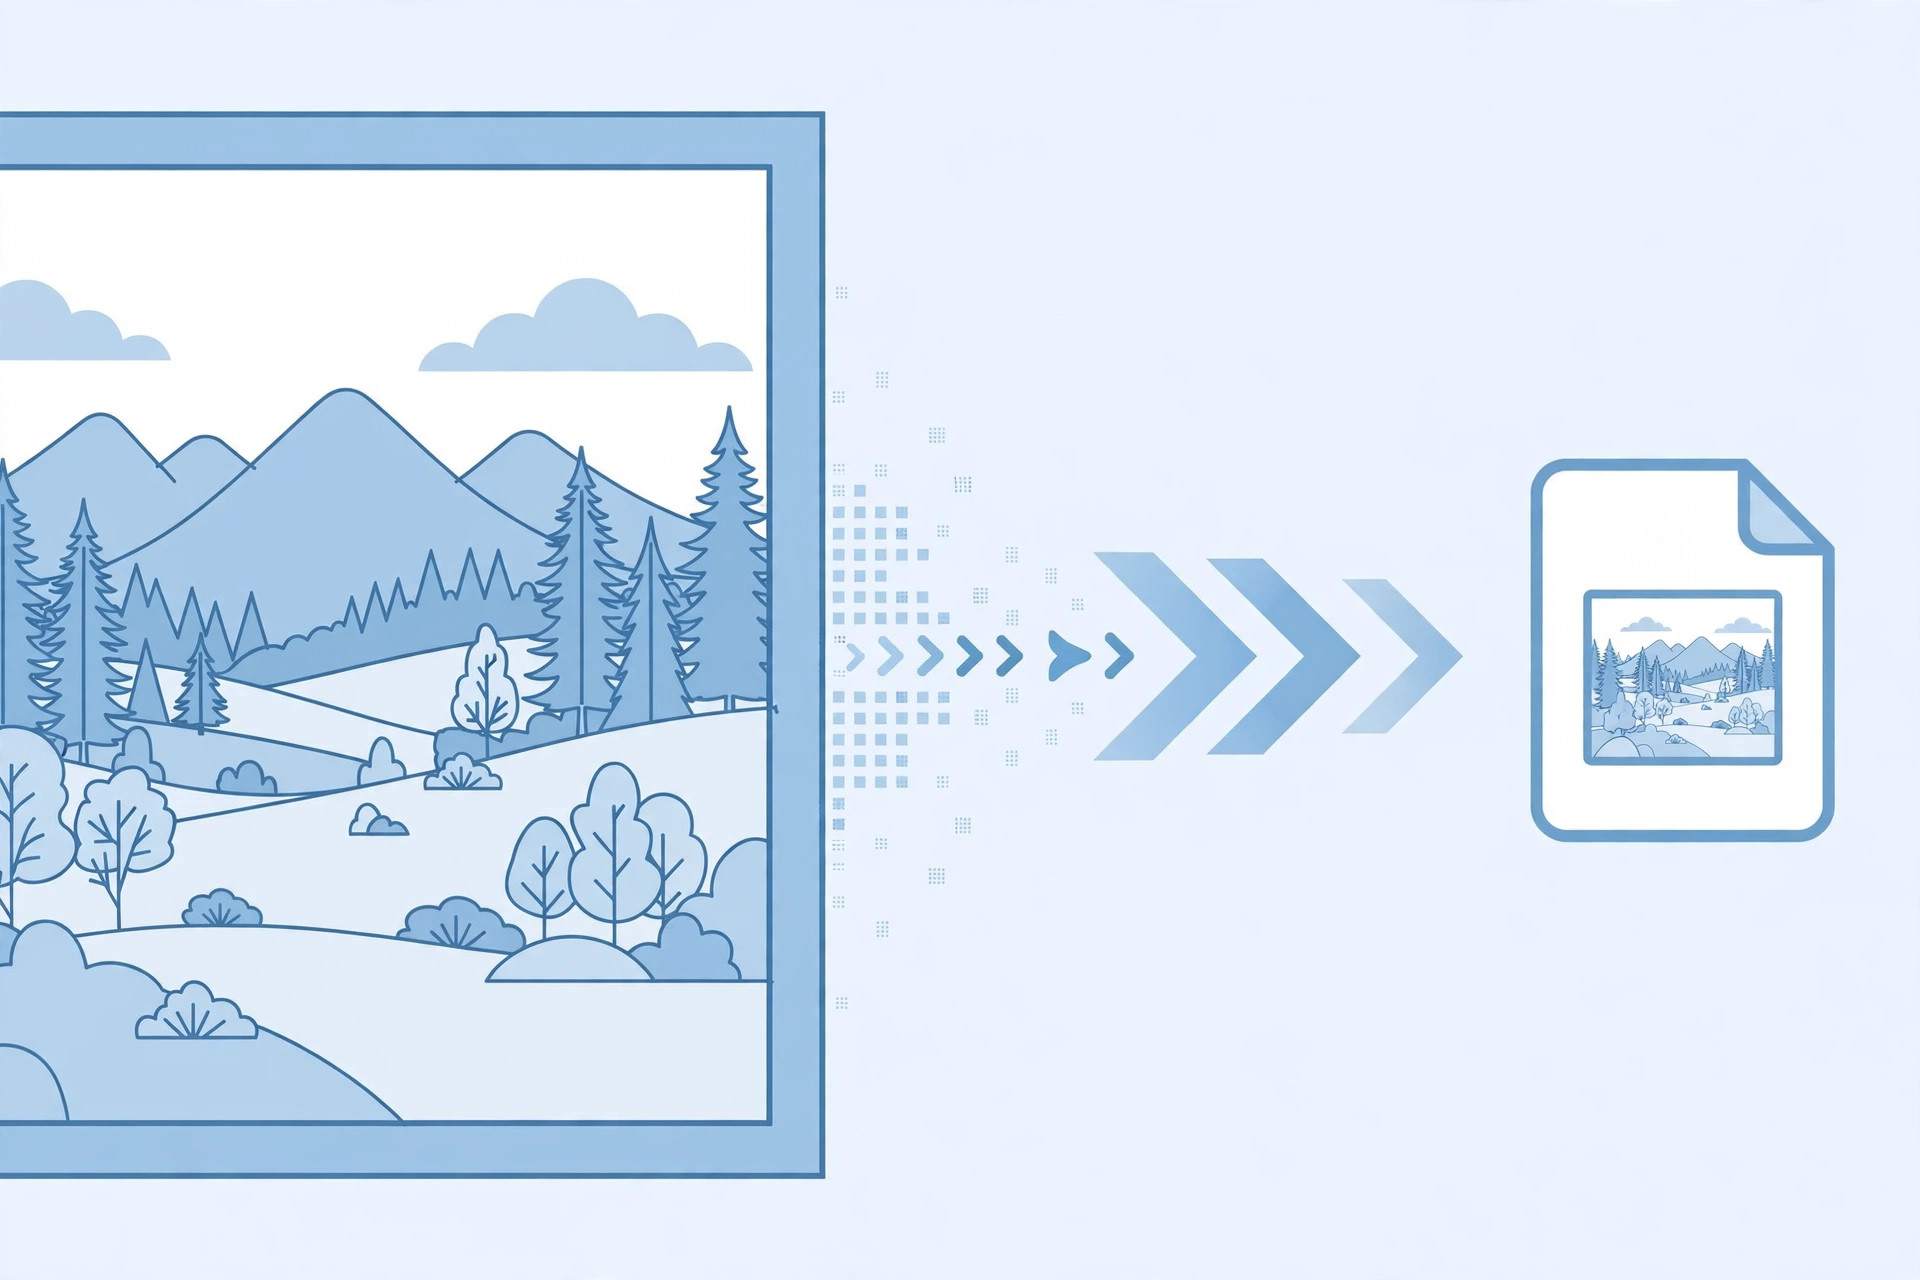
    To convert JPG to WebP for free, upload your JPG to a free online image converter, choose WebP as the output format, and download the converted file. The whole job usually takes under a minute per image, and the result is a modern image file that looks the same as the original but takes up less space. This guide covers the easiest online and desktop methods, plus what to check before you replace your JPGs.

    Why Convert JPG to WebP?

    WebP is a modern image format designed for the web. Compared with JPG, a WebP version of the same photo is usually noticeably smaller at similar visual quality, which means pages load faster, especially on mobile connections, and galleries and online stores use less storage and bandwidth. JPG is still the safest choice when you need maximum compatibility, for example when sending a photo to someone who may open it in an old app, but for websites, blogs and online shops, WebP is now widely supported by modern browsers.

    Method 1: Convert JPG to WebP Online (Fastest)

    1. Open a free online JPG to WebP converter. Pick one that clearly states it is free and does not force you to create an account for a basic conversion.
    2. Upload your JPG from your device or cloud storage. Most tools accept drag and drop and convert several images at once.
    3. Choose WebP as the output format and pick a quality setting if the tool offers one. A high quality setting keeps photos looking clean; a lower setting makes smaller files.
    4. Start the conversion and download the WebP file.
    5. Open the downloaded file and compare it with the original before you delete anything. Check faces, text and fine detail at full size.

    Method 2: Convert JPG to WebP on Your Computer

    If you convert images often, a desktop method keeps files on your machine.

    1. Install a free image editor or converter that supports WebP export, such as GIMP or another free editor available for your system.
    2. Open the JPG in the editor.
    3. Choose Export or Save As and select WebP as the format.
    4. Adjust the quality slider if offered, then export to a new file, keeping the original JPG untouched.
    5. Check the exported file before you use it on your site. Desktop conversion is the better choice for private photos and for large batches.

    JPG vs WebP: What Changes?

    Only the file format and size change. The picture itself stays the same subject, colours and framing. WebP also supports transparency, which JPG does not, but a photo converted from JPG will not gain transparency — it simply becomes a smaller file. One thing to watch: very old browsers and apps may not open WebP, so keep a JPG copy of any image you still need to share widely.

    Tips for Clean WebP Conversions

    • Always work on a copy and keep the original JPG until you have checked the WebP version.
    • Convert at the size you will actually display. A huge photo converted to WebP is still huge, so resize oversized photos first.
    • For product photos and blog images, check the converted file on a phone as well as a computer, since most visitors will see it on mobile.
    • If you need to shrink a photo further for a form or upload limit, an image compressor can reduce it after conversion.
    • Name converted files clearly, for example photo.webp, so you can tell them apart from the originals.

    Common Mistakes to Avoid

    • Deleting the original JPG before checking the WebP file. If the conversion looks wrong, you need the original to try again.
    • Converting a tiny, low-quality JPG and expecting WebP to sharpen it. Conversion cannot add detail that is not there.
    • Uploading sensitive photos to a random converter without checking its privacy policy. For private images, use a desktop app instead.
    • Using WebP everywhere without checking compatibility, for example in an email attachment or a print job that expects JPG.

    Frequently Asked Questions

    Q: Can I convert JPG to WebP for free? A: Yes. Free online converters and free desktop editors both handle JPG to WebP conversion without payment.

    Q: Will my photo lose quality? A: At a high quality setting, the difference is very hard to spot for most photos. Always compare the result with the original before publishing.

    Q: Can I convert WebP back to JPG? A: Yes. The same kinds of tools convert in both directions, so you can keep a JPG copy whenever you need one.

    Q: Is WebP good for a website? A: Yes, for most modern websites it is a good choice because smaller files load faster, and modern browsers support it widely.

    Converting JPG to WebP is a small job that makes websites faster and storage lighter. Pick the online method for a quick one-off, the desktop method for private or batch work, and always check the converted file against the original before you replace the JPG.

  • How to Add a Watermark to a PDF for Free

    How to Add a Watermark to a PDF for Free

    You can add a watermark to a PDF for free in a few minutes using a free online PDF tool or a free desktop app. Upload your PDF, type your watermark text — or upload a logo image — choose its position and transparency, and download the finished file. No paid software and no sign-up is needed for most documents.

    Adding a watermark to a PDF document

    Why Watermark a PDF?

    A watermark is a faint mark printed across the pages of a document. It marks ownership, shows a document’s status, and discourages unauthorised copying — all without hiding the content underneath. Common uses include stamping “DRAFT” on a document under review, “CONFIDENTIAL” on internal reports, “SAMPLE” on a preview sent to a client, and a company logo on quotations, catalogues and study material. A watermark is not a security lock — anyone determined can remove it — but for everyday documents it is a clear, professional signal.

    Method 1: Add a Watermark to a PDF Online (Fastest)

    This is the quickest method for most people, and it works on any device with a browser.

    1. Open a free online PDF watermark tool. Pick one that clearly states it is free and does not force you to create an account for a basic task.
    2. Upload your PDF from your device or cloud storage.
    3. Type your watermark text, such as “DRAFT” or “CONFIDENTIAL”, or upload a logo image if the tool supports image watermarks.
    4. Choose the position. Diagonal across the centre is the classic choice and is hard to crop out; a footer position is subtler but easier to remove.
    5. Set the transparency. A light watermark — around 20 to 40 percent opacity — stays visible without making the text hard to read.
    6. Apply to all pages, or choose specific pages if the tool allows it.
    7. Preview, then download. Check the first, middle and last pages so the watermark sits where you want it and does not cover important text. Save the watermarked file as a new copy, keeping your original untouched.

    Method 2: Add a Watermark to a PDF on Your Computer

    If you watermark documents often, or the document is private, a free desktop app keeps the file on your machine.

    1. Install a free PDF editor that supports watermarks, such as LibreOffice Draw or another free editor available for your system.
    2. Open the PDF in the editor and find the watermark or header/footer option, usually under an “Insert” menu.
    3. Add your text or image, set the size, angle and transparency, and apply it to all pages.
    4. Export or save the file as a new PDF, keeping the original untouched.
    5. Open the saved file and check a few pages to confirm the watermark appears correctly throughout.

    Working offline is a good choice for private documents, since the file never leaves your computer.

    Text Watermark or Logo Watermark?

    Text watermarks are best for status labels: DRAFT, CONFIDENTIAL, SAMPLE, DO NOT COPY. They are quick to create and easy to read. Logo watermarks are best for branding: a company logo on quotations, brochures and course material makes the document instantly recognisable. Use a logo with a transparent background if you have one, so only the logo itself shows and not a white box around it. If your logo has a white background, a photo-background removal tool can strip it first — the same technique used for product photos and logos.

    Tips for a Professional Watermark

    • Keep it light. A watermark should be noticed, not fought with. If it makes the text hard to read, lower the opacity or use a lighter colour.
    • Use the same watermark on every page. Mixed watermarks look careless, even if each page on its own looks fine.
    • For long documents, a diagonal centre watermark is hardest to crop or cover.
    • Match the watermark to the document’s purpose: “DRAFT” for work in progress, “CONFIDENTIAL” for internal files, your logo for client-facing material.
    • Always work on a copy. If the watermark goes wrong, you can start again from the original.
    • If you need to combine several files before watermarking, the PDF Merge tool on iboxseo.org joins multiple PDFs into one file in the browser, so your watermark then runs consistently across the whole document.

    Common Mistakes to Avoid

    • Watermarking too dark. A heavy watermark ruins readability and looks unprofessional.
    • Watermarking over important content. Check that the mark does not sit on top of signatures, stamps or small print.
    • Using a tool that adds its own logo on the free plan. Check the preview carefully, and switch tools if you spot an extra mark stamped on your pages.
    • Overwriting the original file. Once you save over it, the clean version is gone — always save the watermarked PDF under a new name.
    • Treating a watermark as real security. It deters casual copying, but it does not encrypt the file. For truly sensitive documents, use password protection as well.

    Frequently Asked Questions

    Q: Can I add a watermark to a PDF for free?
    A: Yes. Free online PDF tools and free desktop editors both offer watermarking without payment. For a standard document, the free options are all you need.

    Q: Will a watermark work on a scanned PDF?
    A: Yes. A watermark is added as a new layer on top of each page, so it works on scanned pages just as well as on typed ones. Just check the preview to make sure it does not cover any important part of the scan.

    Q: Can I watermark only some pages?
    A: Many tools let you choose which pages to watermark. If yours does not, split the PDF, watermark the part you need, and merge the parts back together.

    Q: Does a watermark protect my PDF from copying?
    A: Partly. It marks ownership and discourages casual copying, but it is not encryption. Combine it with password protection for sensitive files.

    Adding a watermark to a PDF is one of those small jobs that makes a document look finished and owned. Pick the free method that suits you — online, or on your computer — keep it light and consistent, check a few pages, and save the watermarked copy separately. It takes minutes, costs nothing, and makes your document harder to misuse.

  • How to Convert PDF to Excel for Free

    How to Convert PDF to Excel for Free

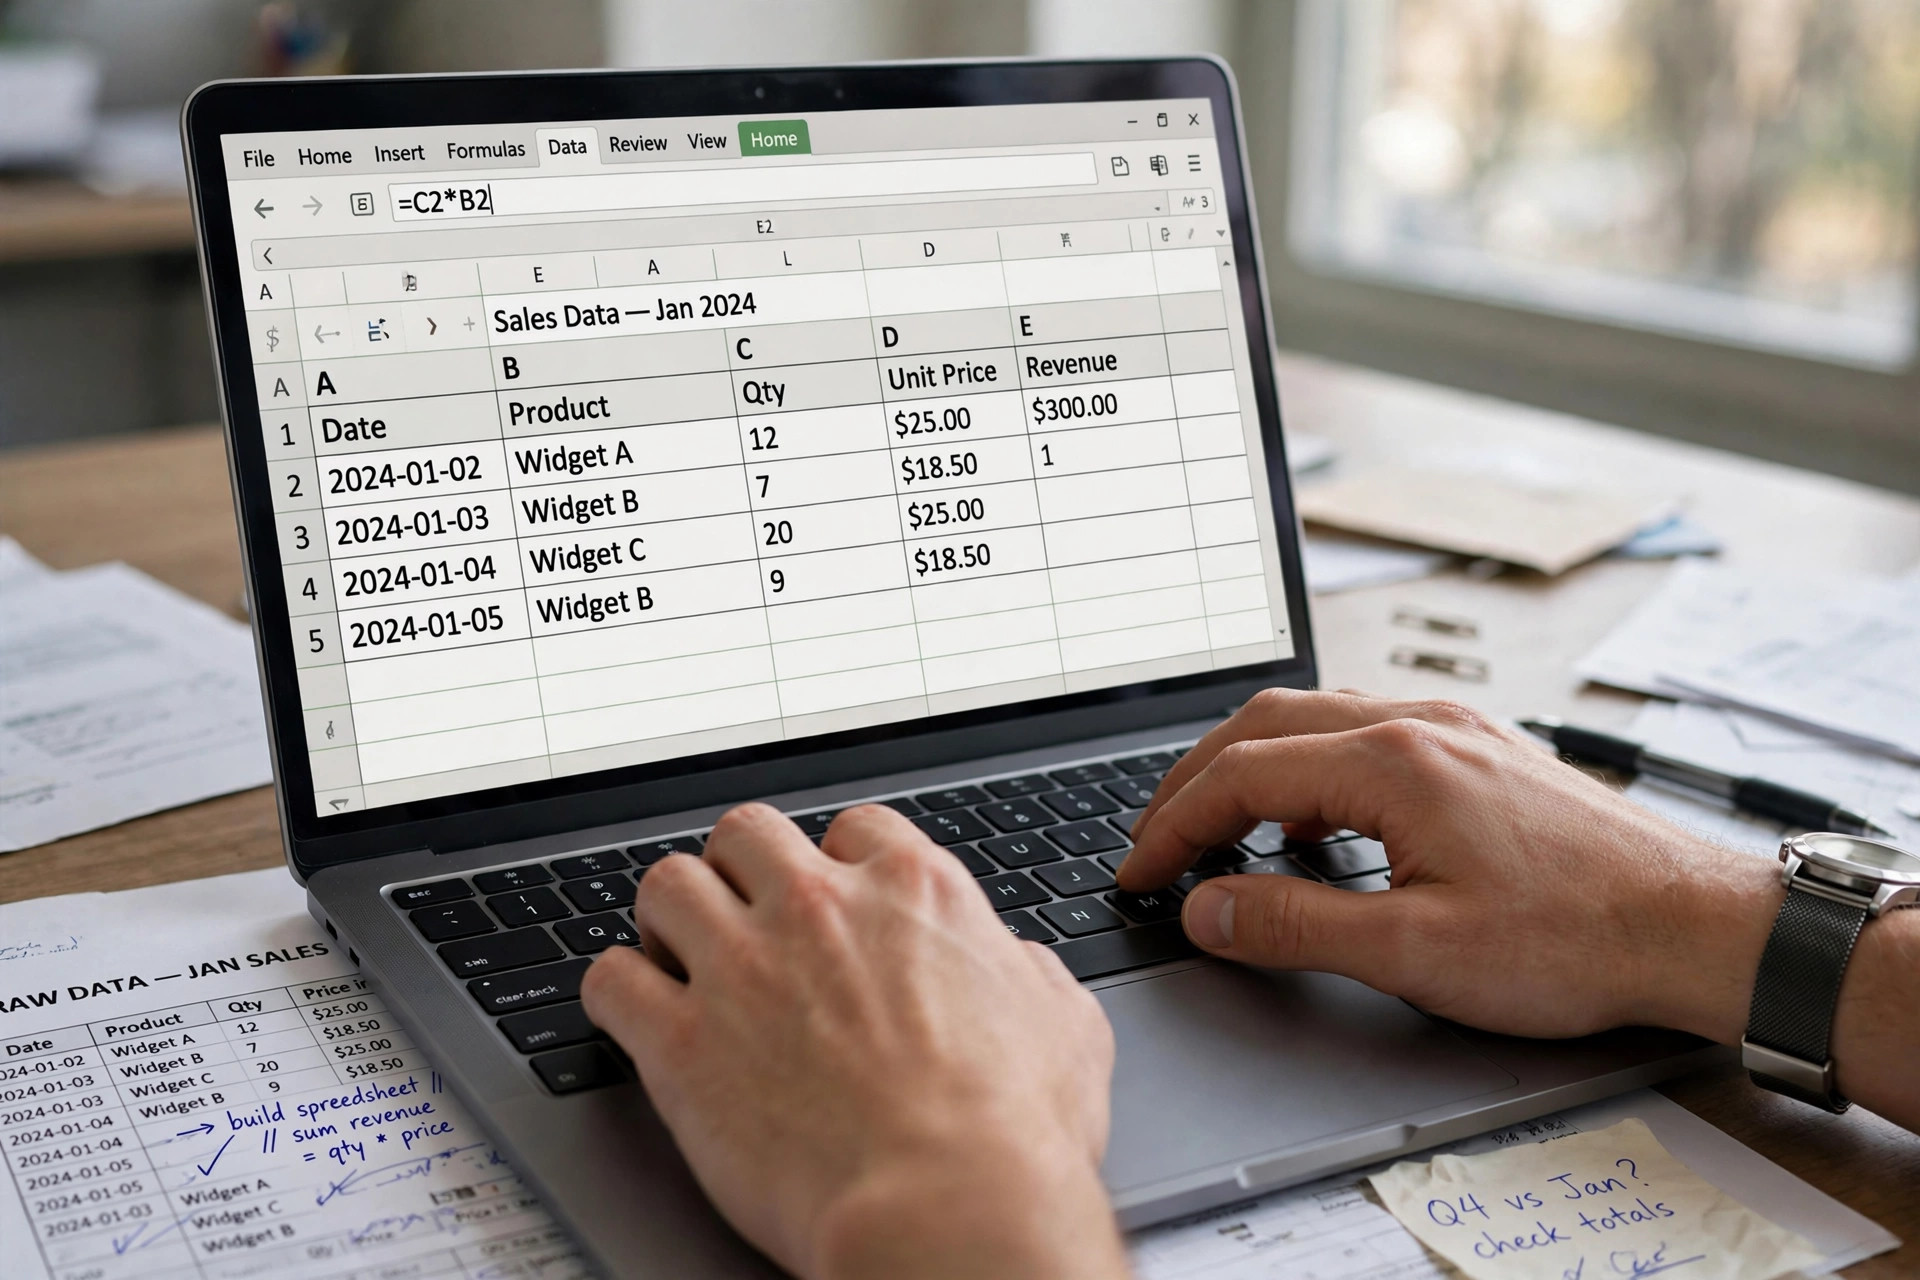
    To convert PDF to Excel for free, upload the PDF to a free PDF-to-Excel converter and download the spreadsheet, or open the PDF in a free spreadsheet app and copy the table across. The whole job usually takes a few minutes, and the result is a normal Excel file you can sort, filter and calculate with. This guide covers the easiest methods for computer, phone and browser, plus how to fix the formatting problems that commonly appear after conversion.

    Converting a PDF table to an Excel spreadsheet

    Why PDF Tables Are Hard to Use

    A PDF is designed to look the same everywhere, not to be edited. Its tables are fixed in place: you cannot sort a column, add up a row, or filter out entries without retyping everything. That is why bank statements, invoices, price lists, attendance sheets and exam results usually arrive as PDFs but need to become spreadsheets before anyone can actually work with them. Converting the PDF to Excel turns that frozen layout back into real rows, columns and numbers.

    Method 1: Convert PDF to Excel Online (Easiest)

    This is the fastest method for most people, and it works on any device with a browser.

    1. Open a free online PDF-to-Excel converter. Pick one that clearly states it is free and does not force you to create an account for a basic conversion.
    2. Upload your PDF from your device or cloud storage. Most tools accept drag and drop.
    3. Choose Excel (.xlsx) as the output format, if the tool asks.
    4. Start the conversion and wait a few seconds. Large files with many pages take a little longer.
    5. Download the spreadsheet, then open it and check the tables before you use them. Look for merged cells, split rows and numbers stored as text, and fix those with the tips below.

    Online conversion suits one-off jobs. For private or sensitive documents, such as salary sheets or bank statements, prefer the desktop method below so the file never leaves your computer.

    Method 2: Convert PDF to Excel on Your Computer

    If you convert tables often, a free desktop app gives you more control.

    1. Install a free office suite that can open PDFs, such as LibreOffice, or use Microsoft Excel’s data import if you have it.
    2. Open the PDF in the app, or import it as data, and let the app detect the tables.
    3. Review the detected table layout. Adjust column boundaries if a column has been split in the wrong place.
    4. Save or export the result as an Excel (.xlsx) file, keeping the original PDF untouched.
    5. Open the saved spreadsheet and check totals, dates and headings against the PDF.

    Desktop conversion is the better choice for long statements and for files you do not want to upload anywhere.

    Method 3: Copy and Paste a Small Table by Hand

    For a single small table, manual copying is sometimes quicker than any tool:

    1. Open the PDF, select the table, and copy it.
    2. Paste it into a blank spreadsheet using “Paste Special” and “Text” or “Unformatted text” if your app offers it.
    3. Use the “Text to Columns” option to split the pasted text into proper columns, choosing the delimiter (tab, comma or space) that matches your data.
    4. Clean up the headings and delete any stray blank rows.

    This method works well for one page. For multi-page tables, an online or desktop converter saves far more time.

    How to Fix Messy Results After Conversion

    Converted spreadsheets rarely come out perfect. These are the most common problems and their fixes:

    • Numbers stored as text: Select the column, look for the warning icon, and choose “Convert to Number”. Until you do this, sums and formulas will ignore those cells.
    • One column split into two: Merge the split columns back together, or re-run the conversion with adjusted table detection.
    • Dates in the wrong format: Select the date column and set its number format to the date style you use, so sorting works correctly.
    • Extra blank rows: Sort or filter the sheet to find blank rows quickly, then delete them in one go.
    • Headings repeated on every page: Delete the repeated heading rows, keeping only the first one, so filters and sorting treat the table as one block.

    What Converts Well — and What Does Not

    Clean, computer-generated PDFs convert well: invoices, statements and reports with straight rows and columns. Scanned PDFs convert poorly, because the “table” is really a picture of a page. For a scanned PDF, first run it through a tool with OCR (text recognition) to turn the picture into real text, then convert the result — and expect to tidy up more afterwards. Handwritten tables will almost always need manual checking.

    Tips for a Clean Spreadsheet

    • Always work on a copy. Keep the original PDF so you can compare figures.
    • Check totals after conversion. If a column total matches the PDF, the conversion is almost certainly right.
    • Convert one table at a time when a PDF mixes several tables on one page.
    • Freeze the top row in Excel so headings stay visible while you scroll.
    • If you need to combine several converted tables, the PDF Merge tool on iboxseo.org can join the source PDFs into one file first, so you convert a single document.

    Common Mistakes to Avoid

    • Trusting the converted file without checking it. Always compare a few rows against the PDF.
    • Uploading sensitive financial documents to a random converter without checking its privacy policy. For private files, use a desktop app instead.
    • Converting a scanned PDF and expecting perfect tables. Scans need OCR first, and even then need checking.
    • Overwriting the original PDF. Save the spreadsheet as a new file and keep the PDF as your reference.

    Frequently Asked Questions

    Q: Can I convert PDF to Excel for free?
    A: Yes. Free online converters and free desktop office suites both handle PDF-to-Excel conversion. Paid software is only needed for very large or complex documents.

    Q: Will the formatting stay exactly the same?
    A: Usually close, but not identical. Column widths, colours and fonts may shift slightly. The data matters most — check figures, then tidy the formatting.

    Q: Why are my numbers not adding up after conversion?
    A: They are probably stored as text. Select the column and convert it to numbers, and your formulas will start working.

    Q: Can I convert a scanned PDF to Excel?
    A: Yes, but only with OCR first. Use a tool that recognises text in scanned pages, then convert and check every figure carefully.

    Converting a PDF to Excel is a small job that unlocks the data inside a frozen document. Pick the online method for a quick one-off, the desktop method for private or long files, and always check totals against the original PDF before you rely on the spreadsheet.

  • How to Compress an Image to 200KB for Online Forms and Uploads

    How to Compress an Image to 200KB for Online Forms and Uploads

    To compress an image to 200KB for online forms and uploads, resize it to about 1200 to 1600 pixels on the longer side, save it as a JPG at 80 to 85 percent quality, and check the size. A typical phone photo of 3 to 5 MB usually lands between 150 and 200KB after those two steps, with no visible loss on a form preview. If it is still above 200KB, reduce the dimensions slightly before you lower the quality, because that keeps faces and text looking clean.

    200KB is a friendlier target than the tighter limits some forms set. You can keep a larger photo and higher quality, so faces, signatures and document text stay crisp. The same two levers still apply — pixel size and JPG quality — but with 200KB you rarely push either one hard.

    Why 200KB is the limit on so many portals

    College admission forms, scholarship applications, exam registrations and job portals commonly cap each uploaded file at 200KB, to keep uploads quick on mobile connections and storage manageable. Photos, signatures and scanned certificates usually each get their own 200KB limit, so the same technique has to work for all three. A photo that is 3 to 5 MB straight from a phone camera is far over the limit, which is why almost every applicant has to compress something before submitting.

    How to compress an image to 200KB online (step by step)

    1. Use the original file. Open the photo or scan from your gallery or files, not a copy forwarded through a chat app, which may already be damaged.
    2. Open a free online compressor in your browser. The Image Compressor on iboxseo.org needs no sign-up: upload the file, set the quality, and download the compressed result.
    3. Resize to about 1200 to 1600 pixels on the longer side. For a 200KB target this size keeps plenty of detail while cutting most of the file weight.
    4. Save as JPG at 80 to 85 percent quality. At this level a photo looks virtually identical to the original on screen, and the file usually lands well under 200KB.
    5. Check the size. If it is between 150 and 200KB, submit it. If it is still above 200KB, trim the width to 1200 pixels and compress once more before touching the quality slider.
    6. Save the compressed file with a clear name, such as photo-200kb.jpg, so you can find it again during the application.

    How to compress an image to 200KB on your phone

    1. On Android, open the photo in your gallery editor, choose resize or export, set the longer side to around 1400 pixels, save as JPG, and check the size in Files.
    2. On iPhone, use a browser-based compressor in Safari, or your photo editor’s export option at high quality, then check the saved file in the Files app.
    3. For a scanned certificate, the same steps apply, but check the text after compressing. Small print goes soft before faces do, so zoom in on the text before you submit.
    4. If you have several files — photo, signature, certificate — compress each one separately. One setting does not suit all three, and a signature needs less resizing than a photo.

    What size should your photo be before you compress it to 200KB?

    Start with the largest original you have. A 4000-pixel photo gives you room to resize down to 1400 pixels and still look sharp. A photo that is already only 800 pixels wide will compress to 200KB more easily, so the two cases balance out. The rule is simple: never enlarge a small photo. Enlarging invents pixels by guessing, which causes blur, and a blurry enlarged photo still fails a visual check even if its file size passes.

    Tips for a clean result at 200KB

    • Keep the original safe and always export a new copy.
    • Do all cropping and rotation before compressing, not after.
    • Check text and signatures at full zoom. If small print is readable, the photo will pass.
    • Use JPG for photos and scans. PNG is only needed when transparency matters, and it makes hitting 200KB much harder.
    • If the portal also lists pixel dimensions, meet those first, then check the file size. Dimensions and file size are two separate requirements.

    Common mistakes to avoid

    • Uploading the raw camera photo and hoping the portal shrinks it. Most portals reject oversized files instead of resizing them.
    • Compressing the same file over and over. Each low-quality save removes detail, so compress once from the original.
    • Saving over the original with the compressed copy.
    • Only checking the photo and forgetting the signature or certificate, which have their own 200KB limits.

    Frequently asked questions about compressing an image to 200KB

    Q: Is 200KB enough for a clear photo?

    A: Yes. A 1400-pixel JPG at 80 to 85 percent quality is sharp on any screen. Portals show uploads at a few hundred pixels, so 200KB is generous.

    Q: Does compressing change my photo’s dimensions?

    A: Only if you resize it. Quality compression alone keeps the pixel dimensions the same but reduces the file size. Resizing changes both, which is why it cuts size so effectively.

    Q: Can I compress a scanned PDF page to 200KB?

    A: Convert the page to a JPG image first, then compress the image with the same steps. A scanned page compresses well as a JPG, but check that the text stays readable.

    Q: Can I compress several photos to 200KB at once?

    A: Yes, if your tool supports batch compression. Apply the same resize and quality settings to the whole set, then spot-check two or three results — especially any with small text — before uploading.

    Hitting 200KB is straightforward: resize to a sensible width, save as JPG at good quality, and verify size and readability before you submit. Your photo stays clear, the portal accepts the file, and the application goes through without a last-minute scramble.

  • How to Compress an Image to 100KB Without Losing Quality

    How to Compress an Image to 100KB Without Losing Quality

    To compress an image to 100KB without losing quality, resize the photo to the size you actually need, save it as a JPG at around 70 to 80 percent quality, and check the file size. Most phone photos drop below 100KB with just those two steps and still look sharp on a form or screen. If the file is still too large, shrink the dimensions a little more instead of pushing quality lower — cutting dimensions hurts visible quality far less than heavy compression.

    The reason this works is simple: a phone photo is usually 4000 pixels wide or more, while a form preview shows it at a few hundred pixels. Those extra pixels add megabytes without adding anything visible, so resizing removes the excess first.

    How to compress an image to 100KB without losing quality

    Why so many forms ask for 100KB

    Government job applications, exam registrations, scholarship forms and college admission portals often cap uploads at 100KB per file, to keep their servers fast and submissions possible on slow connections. The tricky part is that the same form also wants the photo clear enough to identify you, so you cannot just crush the file into a blurry thumbnail. The method below is built for exactly that balance: small enough to upload, clear enough to pass.

    How to compress an image to 100KB online (step by step)

    1. Start from the original photo, not a forwarded copy. A photo already compressed by a chat app has less detail to work with, so go back to the original in your gallery or camera roll.
    2. Open a free online image compressor in your browser. The Image Compressor on iboxseo.org needs no sign-up: upload the photo, choose a quality level, and download the result.
    3. Set quality to around 70 to 80 percent. For most photos this is the sweet spot — the file shrinks dramatically while faces, text and edges stay clean.
    4. Check the file size. If it is at or below 100KB, you are done. If it is still above, do not drop quality to 40 percent straight away.
    5. Resize the dimensions instead: if your photo is 4000 pixels wide, bring it to about 1000 to 1200 pixels on the longer side and compress again. This one change usually brings a stubborn file under 100KB.
    6. Download the compressed copy as a new file and keep your original safe. Check it once at full size: face clear, no blocky patches, no smudged text.

    How to compress an image to 100KB on your phone

    1. On iPhone, use a browser-based compressor in Safari, or your photo editor’s export option, to save a smaller copy. Pick JPG and medium quality, then check the size in the Files app.
    2. On Android, open the photo in your gallery editor or a compressor site in Chrome, reduce it to around 1000 to 1200 pixels wide, save as JPG, and check the size.
    3. If your editor only offers small, medium or large, choose medium first — a medium export from a modern phone is often already close to 100KB.
    4. Avoid screenshots as a way to shrink a photo — they add another round of compression and often include screen elements.

    JPG or PNG: which format reaches 100KB more easily?

    JPG is almost always the better choice for reaching 100KB. It is designed for photographs and compresses smooth colour gradients efficiently. PNG suits logos, graphics and images with sharp text or transparency, but a PNG photo of the same picture is usually several times larger. So if your photo does not need transparency, convert it to JPG first and then compress. If the form specifically asks for PNG, resize the dimensions more aggressively instead.

    Tips to keep your photo sharp at 100KB

    • Resize before you compress. Dimensions first, quality second — this order gives the best result every time.
    • Keep the original untouched — always save the compressed version as a new file.
    • Judge quality at the size the photo will actually be seen — softness visible at full zoom is invisible in a small form preview.
    • Compress once, at the end — every extra low-quality save removes more detail, so finish all cropping and editing first.
    • If the photo looks dull after compressing, brighten it slightly before you compress, not after.

    Common mistakes to avoid when you compress an image to 100KB

    • Dropping quality to the minimum first — a 30 percent JPG looks bad even at small sizes. Lower the dimensions instead.
    • Starting from a forwarded or screenshotted copy — detail already gone cannot be recovered.
    • Saving over the only original — keep a backup, or one wrong export leaves you nothing to redo.
    • Forgetting to check the final size — portals reject files even 1KB over the limit.

    Frequently asked questions about compressing an image to 100KB

    Q: Will compressing an image to 100KB make my photo blurry?

    A: Not if you resize first and keep quality around 70 to 80 percent. It looks sharp at form-preview size, and only softens if you zoom far beyond its display size.

    Q: What pixel size works best for a 100KB photo?

    A: For most forms, 1000 to 1200 pixels on the longer side is a good target — plenty for an on-screen photo, and it usually compresses below 100KB as a JPG.

    Q: Can I compress a PNG photo to 100KB?

    A: Yes, but it takes more work: resize further than you would for a JPG, and if transparency is not needed, converting to JPG first is easiest.

    Q: My photo is still above 100KB after compressing. What now?

    A: Reduce the dimensions in steps — from 1200 to 1000 pixels wide, for example — and compress again. Only lower quality as a last resort, and by small amounts.

    Compressing an image to 100KB is mostly about order: start from the original, resize to what the form shows, save as JPG at sensible quality, and check the size before you upload. Done that way, the file passes the limit while the photo still looks like you.

  • How to Add Page Numbers to a PDF (Free Methods)

    How to Add Page Numbers to a PDF (Free Methods)

    You can add page numbers to a PDF for free in a few minutes using a free online PDF tool or a free PDF editor. Upload your PDF, choose where the numbers should appear — usually the bottom centre or a bottom corner of each page — and download the finished file. No paid software and no sign-up is needed for most documents.

    Page numbers may look like a small detail, but they make a long document far easier to use. Readers can point to an exact page, printed copies stay in order if the pages get mixed up, and reports or assignments look noticeably more professional.

    How to Add Page Numbers to a PDF

    Why Page Numbers Are Worth Adding

    A PDF without page numbers is harder to navigate than it needs to be. If someone prints it and the pages scatter, there is no easy way to put them back in order. If a teacher, employer or client wants to discuss one part of it, they have to describe the section instead of simply naming a page. Page numbers solve both problems at once, and they cost nothing to add. They also help you: when proofreading a long document, it is much easier to note “fix page 12” than to describe where the error sits.

    How to Add Page Numbers to a PDF Online (Free)

    This is the fastest method for most people, and it works on any device with a browser.

    1. Open a free online PDF page-number tool. Pick one that clearly states it is free and does not force you to create an account for a basic task.
    2. Upload your PDF. Most tools accept drag and drop, or let you pick the file from your device or cloud storage.
    3. Choose the position of the numbers. Bottom centre is the classic choice and suits almost every document; bottom right also works well for reports and assignments.
    4. Pick the number format. Plain numbers (1, 2, 3) are fine for most uses. For longer documents, “Page 1 of 20” style numbering helps readers see how far through the file they are.
    5. Set the starting number if needed. If your document has a cover page you do not want numbered, many tools let you start numbering from the second page, or begin at a number other than 1.
    6. Preview, then download. Check the first, middle and last pages so you can be sure the numbers sit where you want them and do not overlap any text. Save the numbered file as a new copy, keeping your original untouched.

    How to Add Page Numbers to a PDF on Your Computer

    If you would rather not upload your document to a website, a free desktop PDF editor does the same job offline.

    1. Install a free PDF editor that supports adding page numbers, such as LibreOffice Draw or another free editor available for your system.
    2. Open your PDF in the editor and find the page-number option, usually under a menu like “Insert”, “Header and Footer” or “Add Page Numbers”.
    3. Choose the position and format: bottom centre or a bottom corner, plain numbers or “Page X of Y”.
    4. Apply the numbering to all pages, then export or save the file as a new PDF.
    5. Check a few pages in the saved file to confirm the numbers appear correctly throughout.

    Working offline is a good choice for private documents, since the file never leaves your computer.

    How to Add Page Numbers to a PDF on Your Phone

    1. Open a free online PDF page-number tool in your mobile browser, or a free PDF app that offers page numbering.
    2. Upload or open the PDF from your phone’s storage or cloud drive.
    3. Choose the position and format of the numbers.
    4. Download the numbered PDF and open it once to check the numbers on a few pages before you share or submit it.

    If you need to combine several files into one document before numbering, do that first: the PDF Merge tool on iboxseo.org joins multiple PDFs into a single file in the browser, so your page numbers then run smoothly across the whole document instead of restarting in each part.

    Tips for Clean, Professional Page Numbers

    • Keep the numbers small and in the same style throughout. Page numbers should be easy to find, not eye-catching.
    • Use the same position on every page. Mixed positions look careless, even if each page on its own looks fine.
    • For long reports, use the “Page X of Y” format so readers always know how much document remains.
    • If your document has a cover page, consider leaving it unnumbered and starting on the next page — standard for reports and assignments.
    • Always work on a copy, and check the margins: numbers placed too close to the edge can get cut off when printed, so bottom centre with a reasonable margin is the safest choice.

    Common Mistakes to Avoid

    • Numbering over existing text. If your pages already have footers, check that the new numbers do not sit on top of them; pick a different corner if they clash.
    • Using a tool that adds a watermark on its free plan. Check the preview carefully, and switch tools if you spot a logo stamped on your pages.
    • Overwriting the original file. Once you save over it, the unnumbered version is gone — always save the numbered PDF under a new name.
    • Numbering each part separately. If your document is made of several files, merge them first and then number the combined file, so the numbers run in one continuous sequence.

    Frequently Asked Questions

    Q: Can I add page numbers to a PDF for free?

    A: Yes. Free online PDF tools and free desktop editors both offer page numbering without payment. For a standard document, the free options are all you need.

    Q: Can I start numbering from a later page?

    A: Yes. Most tools let you skip the first page or set a custom starting number. This is useful when a cover page or title page should stay unnumbered while the rest of the document is numbered from 1.

    Q: Will page numbers work on a scanned PDF?

    A: Yes. Page numbers are added as a new layer on top of each page, so they work on scanned pages just as well as on typed ones. Just check the preview to make sure the numbers do not cover any important part of the scan.

    Q: Do page numbers change my original file?

    A: Only if you overwrite it. When you download or save the numbered version as a new file, your original PDF stays exactly as it was. Keeping both versions is the safest habit.

    Adding page numbers to a PDF is one of those small jobs that makes a document feel finished. Pick the free method that suits you — online, on your computer or on your phone — choose a consistent position, check a few pages, and save the numbered copy separately. It takes minutes, costs nothing, and makes your document easier for everyone to use.

  • How to Edit Text in a PDF for Free (No Paid Software)

    How to Edit Text in a PDF for Free (No Paid Software)

    You can edit text in a PDF for free using a free online PDF editor or a free desktop app. Open the file, click the text you want to change, type the correction, and save a new copy. For small fixes — a typo, a wrong date, an updated phone number — the whole job takes only a few minutes, and you do not need paid software.

    PDFs have a reputation for being unchangeable, but that is only half true. A PDF made from typed text can usually be edited directly, much like a word document. The main exception is a scanned PDF, which is really a set of pictures of pages rather than real text — that needs one extra step, explained below.

    Editing text in a PDF

    What You Can and Cannot Edit in a PDF

    Before you start, it helps to know what kind of PDF you are dealing with. Open the file and try to select a line of text with your mouse or finger. If the text highlights, it is a normal text-based PDF, and you can edit it with the methods below. If nothing highlights and the page behaves like a photo, it is a scanned PDF — the text is part of an image, so an editor cannot change it directly. In that case, use a tool with OCR (text recognition), which reads the scanned pages and turns them into editable text, or retype the page if the change is small. Either way, check the result carefully: OCR sometimes misreads characters, especially in handwriting or faint print.

    How to Edit Text in a PDF Online for Free

    This is the quickest method for a small correction, and it works on any device with a browser.

    1. Open a free online PDF editor. Choose one that lets you edit existing text, not just add comments — some free tools only let you annotate, so check before you upload.
    2. Upload your PDF from your device or cloud storage.
    3. Click on the text you want to change. The editor will place a cursor in the text, much like a word processor.
    4. Type your correction. Fix the typo, date or name, and check that the new text fits the line — if it is much longer than the original, it may wrap awkwardly or overlap nearby text.
    5. Adjust the formatting if needed. Most editors let you match the font size and style of the surrounding text, which keeps the edit invisible.
    6. Download the edited file as a new PDF. Open it and read the changed lines once to confirm everything looks right, then keep your original file as a backup.

    How to Edit Text in a PDF on Your Computer

    If you edit PDFs often, or the document is private, a free desktop app is a better choice because the file never leaves your computer.

    1. Install a free PDF editor that supports text editing, such as LibreOffice Draw or another free editor available for your system.
    2. Open your PDF in the editor and click the text box containing the words you want to change.
    3. Edit the text directly, then check the font and size against the surrounding lines so the change blends in.
    4. If you need to add a whole new paragraph, insert a new text box and place it where the text belongs, matching the existing style as closely as you can.
    5. Export or save the file as a new PDF, keeping the original untouched. Open the saved file and proofread the edited pages before you share it.

    For scanned PDFs on a computer, look for a free tool with OCR support: it converts the scanned pages into editable text first, after which you can correct the words normally. Always proofread OCR results, since misread letters are common.

    How to Edit Text in a PDF on Your Phone

    1. Open a free PDF editor app, or use a free online PDF editor in your mobile browser.
    2. Open the PDF from your phone’s storage or cloud drive.
    3. Tap the text you want to change and type the correction. On a small screen, zoom in so you tap the right line.
    4. Save or download the edited PDF as a new file, then open it once to check the change before sending it on.

    Phone editing suits quick fixes. For heavy rewriting, a computer is easier, because selecting and formatting text on a large screen is far less fiddly.

    Tips for Edits That Look Natural

    • Match the font, size and colour of the surrounding text. An edit in a different font stands out immediately.
    • Keep replacement text close to the original length. A much longer replacement can push lines around and break the page layout.
    • Edit a copy, never the only version. If the edit goes wrong, you can start again from the original.
    • Proofread the whole page, not just the edited line. A small change can shift spacing elsewhere on the page.
    • If you need to combine the edited PDF with other files afterwards, the PDF Merge tool on iboxseo.org joins multiple PDFs into one file in the browser, free and without a login.
    • For documents you will print, check the edited pages in print preview too — a change that looks fine on screen can occasionally sit awkwardly on paper.

    Common Mistakes to Avoid

    • Editing the only copy of the file. Always work on a duplicate, so a bad edit costs you nothing.
    • Using a tool that only adds comments or sticky notes. Annotations sit on top of the page but do not change the actual text, so the original error remains in the document.
    • Trying to edit a scanned PDF like a normal one. If the text will not highlight, no amount of clicking will change it — use OCR or retype the page instead.
    • Ignoring font mismatches. New text in the wrong font or size is the clearest sign a PDF was edited, which matters for formal documents.
    • Forgetting to check the saved file. Some editors need an extra export step, and it is easy to send the old version by mistake. Open the saved PDF and confirm the change is really there before you share it.

    Frequently Asked Questions

    Q: Can I edit text in a PDF for free?
    A: Yes. Free online PDF editors and free desktop apps both let you change existing text without payment. Small corrections are fully possible for free; paid software is only needed for advanced features like large-scale reformatting.

    Q: Why can’t I select or edit the text in my PDF?
    A: Your PDF is probably a scan — a picture of a page rather than real text. Use a tool with OCR to convert the scanned pages into editable text first, then edit normally. If the file is password-protected against editing, you will also need the password or permission from the file’s owner.

    Q: Will my edits look the same as the original text?
    A: They will if you match the font, size and colour of the surrounding text and keep the replacement roughly the same length. A short correction in matching style is normally invisible; a long inserted paragraph in a different font is easy to spot.

    Q: Is it safe to edit a PDF online?
    A: For ordinary documents, yes — but for private or sensitive files, prefer a free desktop editor so the file never leaves your computer. Either way, work on a copy and keep the original safe.

    Editing text in a PDF for free is mostly about picking the right method for your file: an online editor for a quick fix, a desktop app for private or frequent edits, and OCR for scanned pages. Match the surrounding style, check the saved file, and keep your original safe — and a correction that once meant retyping a whole document takes just a few minutes.

  • How to Convert Word to PDF for Free (All Devices)

    How to Convert Word to PDF for Free (All Devices)

    To convert Word to PDF for free, open your document and use the built-in Export or Save as PDF option, or upload it to a free online converter and download the PDF. It takes under a minute, needs no paid software, and the PDF will look the same on any device. Below are the easiest methods for computer, phone and browser.

    How to convert Word to PDF for free

    Why Convert a Word Document to PDF?

    A Word file can look different depending on the device, app and fonts available when it is opened. A PDF freezes the layout: fonts, spacing, images and page breaks stay exactly where you put them, whether the file is opened on a phone, a laptop or a printed page. That is why forms, resumes, assignments, invoices and official letters are usually shared as PDFs. A PDF is also harder to edit by accident, so the person receiving it sees the document exactly as you intended. Converting is therefore less about changing the content and more about protecting how it looks.

    How to Convert Word to PDF on Your Computer

    In Microsoft Word:

    1. Open the document in Word and give it a final read-through, checking headings, images and page breaks.
    2. Go to File, then Export or Save As, and choose PDF as the file type.
    3. Pick where to save the file and give it a clear name.
    4. Click Save or Export. Word creates the PDF in seconds.
    5. Open the PDF and scroll through every page to confirm nothing moved.

    In Google Docs or LibreOffice:

    In Google Docs, open the document, go to File, then Download, and choose PDF Document. In LibreOffice Writer, use File, then Export As PDF. Both options are free and produce a standard PDF. If your document uses unusual fonts, check the PDF carefully: a font that is not available on the receiving device can be substituted, which may change spacing slightly.

    How to Convert Word to PDF on Your Phone

    1. Open the document in a word-processing app on your phone, such as the Word app or Google Docs app.
    2. Look for the Share, Export or Send a Copy option in the menu.
    3. Choose PDF as the format. The app will create the PDF on your phone.
    4. Save it to your files, or share it directly by email or messaging app.
    5. Before sending, open the PDF once and check images, tables and headings, since phone screens can hide layout problems.

    How to Convert Word to PDF Online for Free

    If you do not have a word-processing app handy, a free online converter works just as well. Open a free Word-to-PDF converter in your browser, upload the Word file, wait a few seconds for the conversion, and download the finished PDF. This method is useful on shared or borrowed computers where you cannot install software. As with any online tool, avoid uploading sensitive documents, and keep your original Word file safe.

    Tips for a Clean, Professional PDF

    Use fonts that are common across devices, since unusual fonts are the most common cause of layout changes. Keep images at a reasonable size: very large photos make the PDF heavy and slow to send, while tiny images turn blurry in print. Check page breaks before converting, so a heading does not end up alone at the bottom of a page. Give the PDF a clear file name, such as resume-your-name.pdf, rather than leaving a generic name. If you convert several documents and need them in one file, the PDF Merge tool on iboxseo.org combines multiple PDFs into one file free in the browser. Finally, always open the finished PDF and skim every page — a thirty-second check catches problems before the recipient does.

    Common Mistakes to Avoid

    Converting without checking the result is the most common mistake: people assume the PDF matches the Word file, but a shifted table or missing image is easy to miss. Another mistake is sending the Word file when a PDF was asked for, which risks the layout changing on the recipient’s device. Do not convert a draft by accident — confirm the document is final, with no tracked changes or comments left visible. Avoid converting the same file back and forth between formats repeatedly, as each conversion can shift the layout slightly. And do not use a screenshot of the document as a substitute for a real PDF: it looks unprofessional and cannot be searched or printed cleanly.

    Frequently Asked Questions

    Q: Can I convert Word to PDF for free without installing anything?
    A: Yes. Word, Google Docs and LibreOffice all include a free built-in PDF export, and free online converters do the same job in your browser with no installation at all.

    Q: Will the PDF look exactly like my Word document?
    A: Almost always, yes. PDFs preserve fonts, spacing, images and page breaks. The main exception is unusual fonts, which can be substituted on another device — using common fonts avoids this.

    Q: Can I convert Word to PDF on my phone?
    A: Yes. The Word app and Google Docs app both offer a free export or share-as-PDF option, and free converter websites work in a mobile browser too.

    Q: What if my PDF file is too large to send?
    A: Large images are usually the cause. Compress the images in the Word document before converting, or reduce the PDF size afterwards with a free PDF compression tool, then check that the text and images still look sharp.

    Final Tip

    Converting Word to PDF for free is one of the simplest document tasks there is: open the file, choose Export or Save as PDF, check the result, and send it. The PDF protects your layout, looks the same on every device, and reads as more professional than a raw Word file. Make it a habit before sharing any finished document, and you will never again worry about how your file looks on someone else’s screen.

  • How to Convert PDF to Word for Free (Without Losing Formatting)

    How to Convert PDF to Word for Free (Without Losing Formatting)

    To convert PDF to Word for free, upload your PDF to a free online PDF-to-Word converter, or open it in a word processor that can import PDFs, then download the result as a Word document. The whole process takes a few minutes and needs no paid software. Below are the easiest methods for computer and phone, plus tips to keep your formatting intact.

    How to convert PDF to Word for free

    Why PDF Formatting Sometimes Breaks

    A PDF is designed to look the same everywhere, so it stores text, images and layout in fixed positions on each page. A Word document works differently: it flows text, so headings, paragraphs and tables adjust when you edit them. That difference is why conversion is not always perfect. Simple documents with plain paragraphs usually convert cleanly, while complex layouts with multiple columns, tables, footnotes or unusual fonts may need a quick tidy-up afterwards. Knowing this in advance saves frustration: expect a very good result, then spend two minutes checking it.

    How to Convert PDF to Word for Free on Your Computer

    Method 1: Use a free online converter

    1. Open a free online PDF-to-Word converter in your browser. No download or sign-up is needed for a basic conversion.
    2. Upload your PDF file. Most converters accept drag and drop, so you can drop the file straight into the page.
    3. Start the conversion and wait for it to finish. Small documents take seconds; large ones with many pages take a little longer.
    4. Download the Word file, usually in .docx format. Save it to a folder where you can find it easily.
    5. Open the downloaded file and check every page. Look at headings, tables, images and page breaks, and fix anything that shifted.
    6. Save a backup of the original PDF. If the conversion ever needs redoing, you still have the untouched original to start from.

    Method 2: Open the PDF in a word processor

    Some word processors can open a PDF and turn it into an editable document themselves. In Microsoft Word, use File, then Open, and select the PDF — Word will convert it and warn you that the layout may change slightly. In Google Docs, upload the PDF to Google Drive, open it, and choose the option to open it with Google Docs, which creates an editable copy you can download as a Word file.

    How to Convert PDF to Word on Your Phone

    1. If the PDF is on your phone, open it in a free converter website in your mobile browser, or use a free PDF app that offers conversion.
    2. Upload the PDF from your files or gallery, and choose Word as the output format.
    3. Wait for the conversion, then download the Word file to your phone.
    4. Open it in a word-processing app to check the formatting before you share or edit it further.
    5. If the layout looks messy on a small screen, check it again later on a computer — phone screens hide problems that are obvious on a larger display.

    Tips to Keep Your Formatting Intact

    Start with the best original you have. A clean, text-based PDF converts far better than a blurry scan, because the converter can read real text rather than guessing at pictures of words. If your PDF is a scan, look for a converter with text-recognition support, and be ready to proofread more carefully. Simple fonts convert more reliably than decorative ones. After converting, check tables first, since they are the most likely element to move, then images, then headings. If you only need the pictures from a PDF page rather than editable text, the PDF to Image tool on iboxseo.org converts PDF pages to images free in the browser, which is a simpler job than a full document conversion.

    Common Mistakes to Avoid

    Converting a scanned PDF and expecting perfect text is the biggest mistake — a scan is a picture, not text, so the result will always need checking. Another common mistake is deleting the original PDF right after converting; keep it until you have checked and saved the Word version. Do not trust the first page alone: many people check page one, assume the rest is fine, and only discover a broken table on page five after sending the file. Finally, do not paste converted text into a new document to “clean it up” — that strips out styles and tables, and creates more work than fixing the converted file directly.

    Frequently Asked Questions

    Q: Can I convert PDF to Word for free without installing software?
    A: Yes. Free online converters and browser-based word processors handle the whole conversion in your browser, so nothing needs to be installed on your computer or phone.

    Q: Will my tables and images survive the conversion?
    A: Usually yes. Simple tables and images generally transfer well, but complex tables, multi-column layouts and unusual fonts may shift slightly, so check those parts after converting.

    Q: What if my PDF is a scanned document?
    A: A scanned PDF contains pictures of pages, not selectable text. You need a converter with text-recognition support, and you should proofread the result carefully, since recognition can misread characters, especially in handwriting or low-quality scans.

    Q: Is it safe to upload my PDF to a free converter?
    A: For ordinary documents, yes, but use common sense. Avoid uploading documents with passwords, bank details, identity numbers or other sensitive information to any free online tool. For sensitive files, use a word processor on your own computer instead.

    Final Tip

    Converting PDF to Word for free is a two-minute job once you pick the right method: an online converter for speed, or a word processor you already use for convenience. Start from the best original you have, convert once, check the tables and images, and keep the original PDF safe. Do that, and your document will be editable without losing the layout that made it look professional in the first place.

  • How to Convert PDF to JPG in High Quality (Free Methods)

    How to Convert PDF to JPG in High Quality (Free Methods)

    To convert PDF to JPG in high quality, upload your PDF to a free PDF to Image tool, choose a resolution of 200 to 300 DPI, and download each page as a separate JPG image. The result is a set of sharp, clear images that look good on screen and in print. The single biggest factor in quality is resolution: too low and the text turns blurry, too high and the files become unnecessarily large.

    This guide covers converting PDF pages into JPG images — every page becomes one JPG file, text and all. That is different from pulling embedded photos out of a PDF. It is useful for sharing a page on WhatsApp, uploading to a form that only accepts images, or inserting a page into a presentation.

    Converting PDF pages to JPG images

    How to Convert PDF to JPG Online (Free)

    1. Open a free PDF to Image tool in your browser, such as the PDF to Image tool on iboxseo.org. No software install or sign-up is needed for a simple conversion.
    2. Upload your PDF file. Most tools accept drag and drop, so you can drop the file straight into the page.
    3. Choose which pages to convert. You can usually convert all pages at once, or pick a page range if you only need a few pages.
    4. Set the resolution. Look for a quality or DPI setting and choose 200 to 300 DPI for sharp results. If the tool only offers low, medium and high, pick high.
    5. Start the conversion and wait for it to finish. A long document takes a little longer, but each page is processed automatically.
    6. Download the JPG files and check them. Open the first page at full size and confirm the text is sharp and easy to read before you share or upload anything.

    How to Convert PDF to JPG on Your Phone

    1. Open your phone’s browser and go to a free PDF to Image tool — no app is required.
    2. Upload the PDF from your files or downloads folder.
    3. Choose the pages and the quality setting, just as you would on a computer.
    4. Convert and download the JPG files. On most phones they land in the downloads folder, from where you can move them to your gallery or share them directly.
    5. Check one image at full zoom before sending it. If it looks blurry, convert again at a higher resolution.

    Choosing the Right Quality Settings for PDF to JPG Conversion

    Resolution, measured in DPI (dots per inch), decides how sharp the JPG looks. Around 150 DPI is fine for sharing on screen, such as WhatsApp or social media, where the image is viewed small. For printing, or for pages with small text, use 200 to 300 DPI — the text stays crisp when printed or zoomed in. Going far beyond 300 DPI rarely helps: the files get much bigger while the visible difference becomes tiny, because the original PDF page itself has a limited amount of detail.

    If the tool also offers a JPG quality slider, keep it high — around 85 to 95 percent. Below that, compression starts to blur fine text and create artefacts around letters.

    Tips for Sharp, Clean JPGs

    • Always start from the original PDF, not from a photo or screenshot of it. A conversion from the original keeps every detail the document has.
    • Convert at the size you actually need. If the JPG is only going on screen, 150 to 200 DPI keeps files light; if it will be printed, go to 300 DPI.
    • Keep the page proportions locked. Never stretch a page to fit a different shape — stretched text looks wrong immediately.
    • Name the downloaded files clearly, such as form-page-1.jpg and form-page-2.jpg, so the pages stay in order when you share them.
    • If a JPG is still too large for an upload form, shrink it afterwards with a free image compressor, such as the Image Compressor on iboxseo.org.

    Common Mistakes to Avoid

    The most common mistake is screenshotting a PDF page instead of converting it. A screenshot captures only what fits on your screen at screen resolution, so the text comes out soft and often cut off. A proper conversion renders the full page at the resolution you choose, which is always sharper.

    Other mistakes: picking the lowest resolution to save time; never checking the output before sending it; and converting the same pages repeatedly, since every JPG save loses a little quality. Convert once, at the right settings.

    One more caution: if your PDF contains private information, use a tool you trust and avoid uploading sensitive documents to unfamiliar websites. For everyday documents like forms, notes and certificates, a well-known free tool is fine.

    FAQ

    Q: Will converting PDF to JPG reduce quality?
    A: It depends on the settings you choose. At 200 to 300 DPI with high JPG quality, the result looks essentially identical to the original page. At low resolution, text will look blurry — so always check the first page before using the rest.

    Q: Can I convert only one page of a PDF to JPG?
    A: Yes. Most PDF to Image tools let you select specific pages or a page range, so you can convert just one page of a long document.

    Q: Should I choose JPG or PNG for PDF pages?
    A: JPG is the better choice for most pages, especially scanned pages and pages with photos, because it keeps file sizes small. PNG suits pages that are mostly sharp text and line graphics, where you want absolutely no compression artefacts — but the files will be larger.

    Q: Is it safe to convert a PDF to JPG online?
    A: For ordinary documents, yes, if you use a reputable tool. For highly sensitive documents, prefer an offline method on your own computer.